See how we’ve developed a Low Poly Spaceship by using Cinema 4D, ZBrush, UVLayout, Maya, X Normal, Quixel Suite, Substance Painter and Unity 3D.
Hi everyone! In this Dev Blog we’re going to show you how to model a Low Poly Spaceship from scratch, in a simple and useful way. For us this is a initial step because the spacecrafts of Phobos Vector Prime aren’t low poly, but detailed high poly models based on assets with a fewer number of polygons. Here’s how we design the initial Low Poly Spaceship which we’ll transform later on a high poly model:
1.- Concept Creation
First of all you may think in every detail that you want in the spaceship. Make a sketch on a paper (or wherever you feel comfy) by using basic geometric shapes. Also you may keep in mind that the design must have sense: if you’re drawing a resistant spaceship try to make it look strong. Decide in this step the kind of weapons/powers/defenses that you spaceship will have.
It’s all about details. We aren’t only talking about of the videogame’s aesthetic and the atmosphere, but also about its size, form, weapons, skills, special effects, textures, behavior and even its place on the game’s story.
Our team works on the following way: the game designer thinks and design a spaceship, talks with the programer and decides what weapons and powers it may have, then they draws it on a paper and give it to the 2D artist, who design the vehicle’s concept art which will guide the modelling of the Low Poly Spaceship carried out by the 3D artist. Easy peasy.
Actually before start the modelling process the team has to approve the spaceship’s concept. It has to be well adapted to the retro aesthetic of Phobos Vector Prime, that has an marked 80s style but with realistic/futuristic assets.
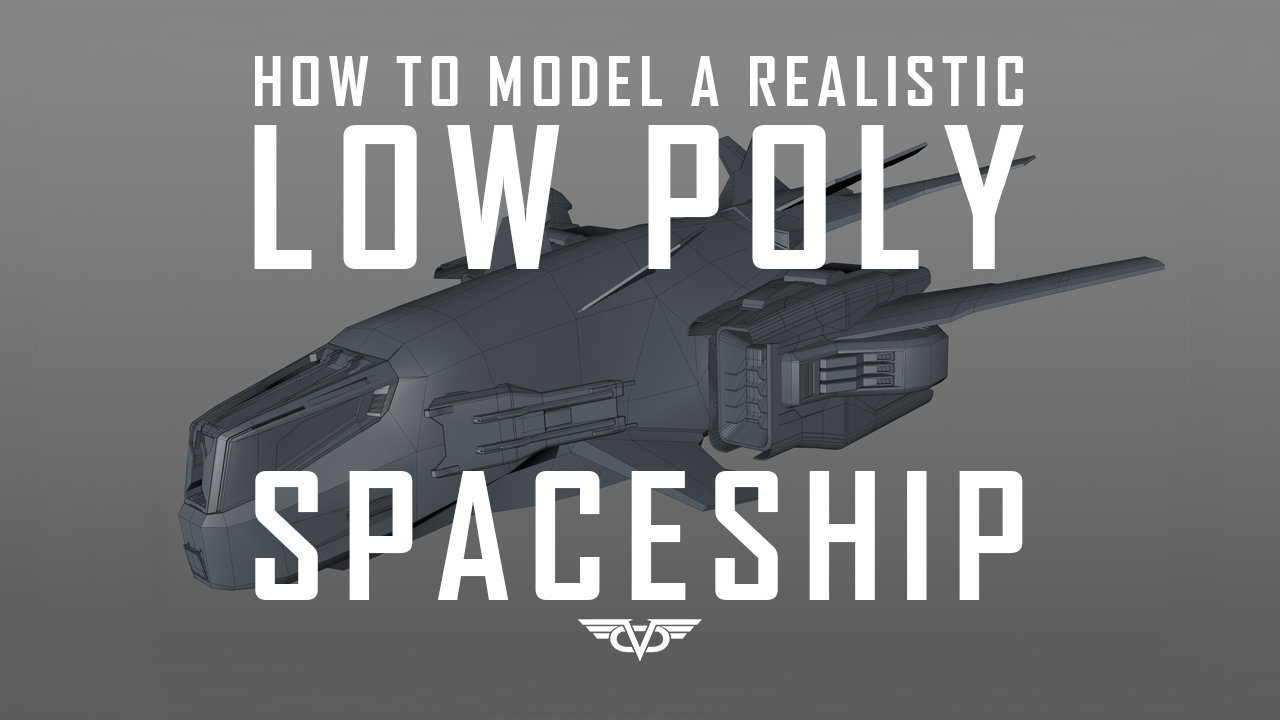
2.- Low Poly Spaceship Modelling
When the concept gets approved, the modelling stage of the object starts. This process is so hard that it can last several days. Even weeks. In this step we use a vast bunch of software: Cinema 4D, ZBrush, UVLayout, Maya, X Normal, Quixel Suite, Substance Painter and, finally, Unity 3D.
We use Cinema 4D to design the vehicle following the initial concept and looking for a Low Poly Spaceship model composed of simple forms. In this GIF you can see how our 3D artist composes the model by connecting simple and large polygons to each other:
After finish the 3D model is important to unwrap the UV, i.e. export each polygon to a coordinates graphics. You can use UVLayout or Maya. Thanks to this technique we can divide the Low Poly Spaceship depending its materials textures. It’s also a way to facilitate our work for next steps.
3.- Adding Details
When the model is ready we export the object to ZBrush. There we add polygon subdivision, converting our low poly asset in a high poly one, that will be heavier than the previous but also more detailed. The details are very important for us! Watch the GIF below to see how we add details with ZBrush:
As we said, because the higher number of polygons the asset will be heavier. This can drive some performance problems, so you need to optimize the high poly before export it. This way we keep the model details saving polygon density. You can use various plugins for this purpose, but we recommend Decimation Master.
To continue with the process it’s necessary to export both models (High Poly and Low Poly) to X Normal. Here we baking in the model, i.e. overturning the high poly model information in the Low Poly Spaceship like if you were putting stickers. So you have a realistic and detailed spaceship but with a low number of polygons.
Then we have to extract channels of the object that mean each different property of the object material. In this case: Normal, Ambient Occlusion, Bent Normal, Height and Curvature. Every channel is a map with an expecifict applications. The most important is the Normal Map. We use it to keep the details of the high-poly model in our spaceship low-poly. first.
Now we go to the most artistic stage with Quixel Suite (you can use also Substance Painter if you prefer it). So is time to add the material, paints, textures and the rest of details. In this part we have to use the Occlusion Map. Is the final stage to modify the spaceship project, after will be impossible. From this point, our spaceship must be ready to fly. In this part of the process you can detail how you prefer the spaceship. See how we do it on Quixel Suite:
4.- Asset Integration
Finally, the last step of the modeling process of our Low Poly Spaceship is over. It’s time to integrate the asset in the graphic motor, in our case is Unity 3D. Here we need to import every information, from textures to any Quixel object, determining how to will be in the final game. This may be a hard process so we’ll explain it in followings dev blogs.